Overview
The MDS Collivery Shipping plugin offers live shipping rates and automatic shipping waybill creation. The installation of the Collivery.net plugin is as easy as a few clicks of the mouse, once installed the plugin will only need you to enter your username and password.
The MDS Collivery Shipping plugin enhances e-commerce fulfillment with real-time rates, automated waybills, and seamless carrier integration for precise, efficient, and streamlined order processing.
- Shipping rates on checkout
- Automatic Waybill creation
- Demo account available so you can test without registration
Installation Instructions
Subscription Requirement
To unlock the full benefits of courier-calculated rates, the Shopify account must be on the Shopify Plus subscription plan. This plan enables advanced features such as real-time rate calculation, allowing merchants to provide accurate shipping rates to their customers during checkout.
* Disclaimer
Collivery.net provides the following plugins as a service to our clients. The responsibility to ensure that the integration is working correctly rests with the client. Collivery.net does not accept responsibility for any errors in pricing, addresses or any other part of the Collivery process which may not work correctly. By downloading the attached plugins the clients accepts the above conditions and will not in any way hold Collivery.net responsible for errors.
Installation
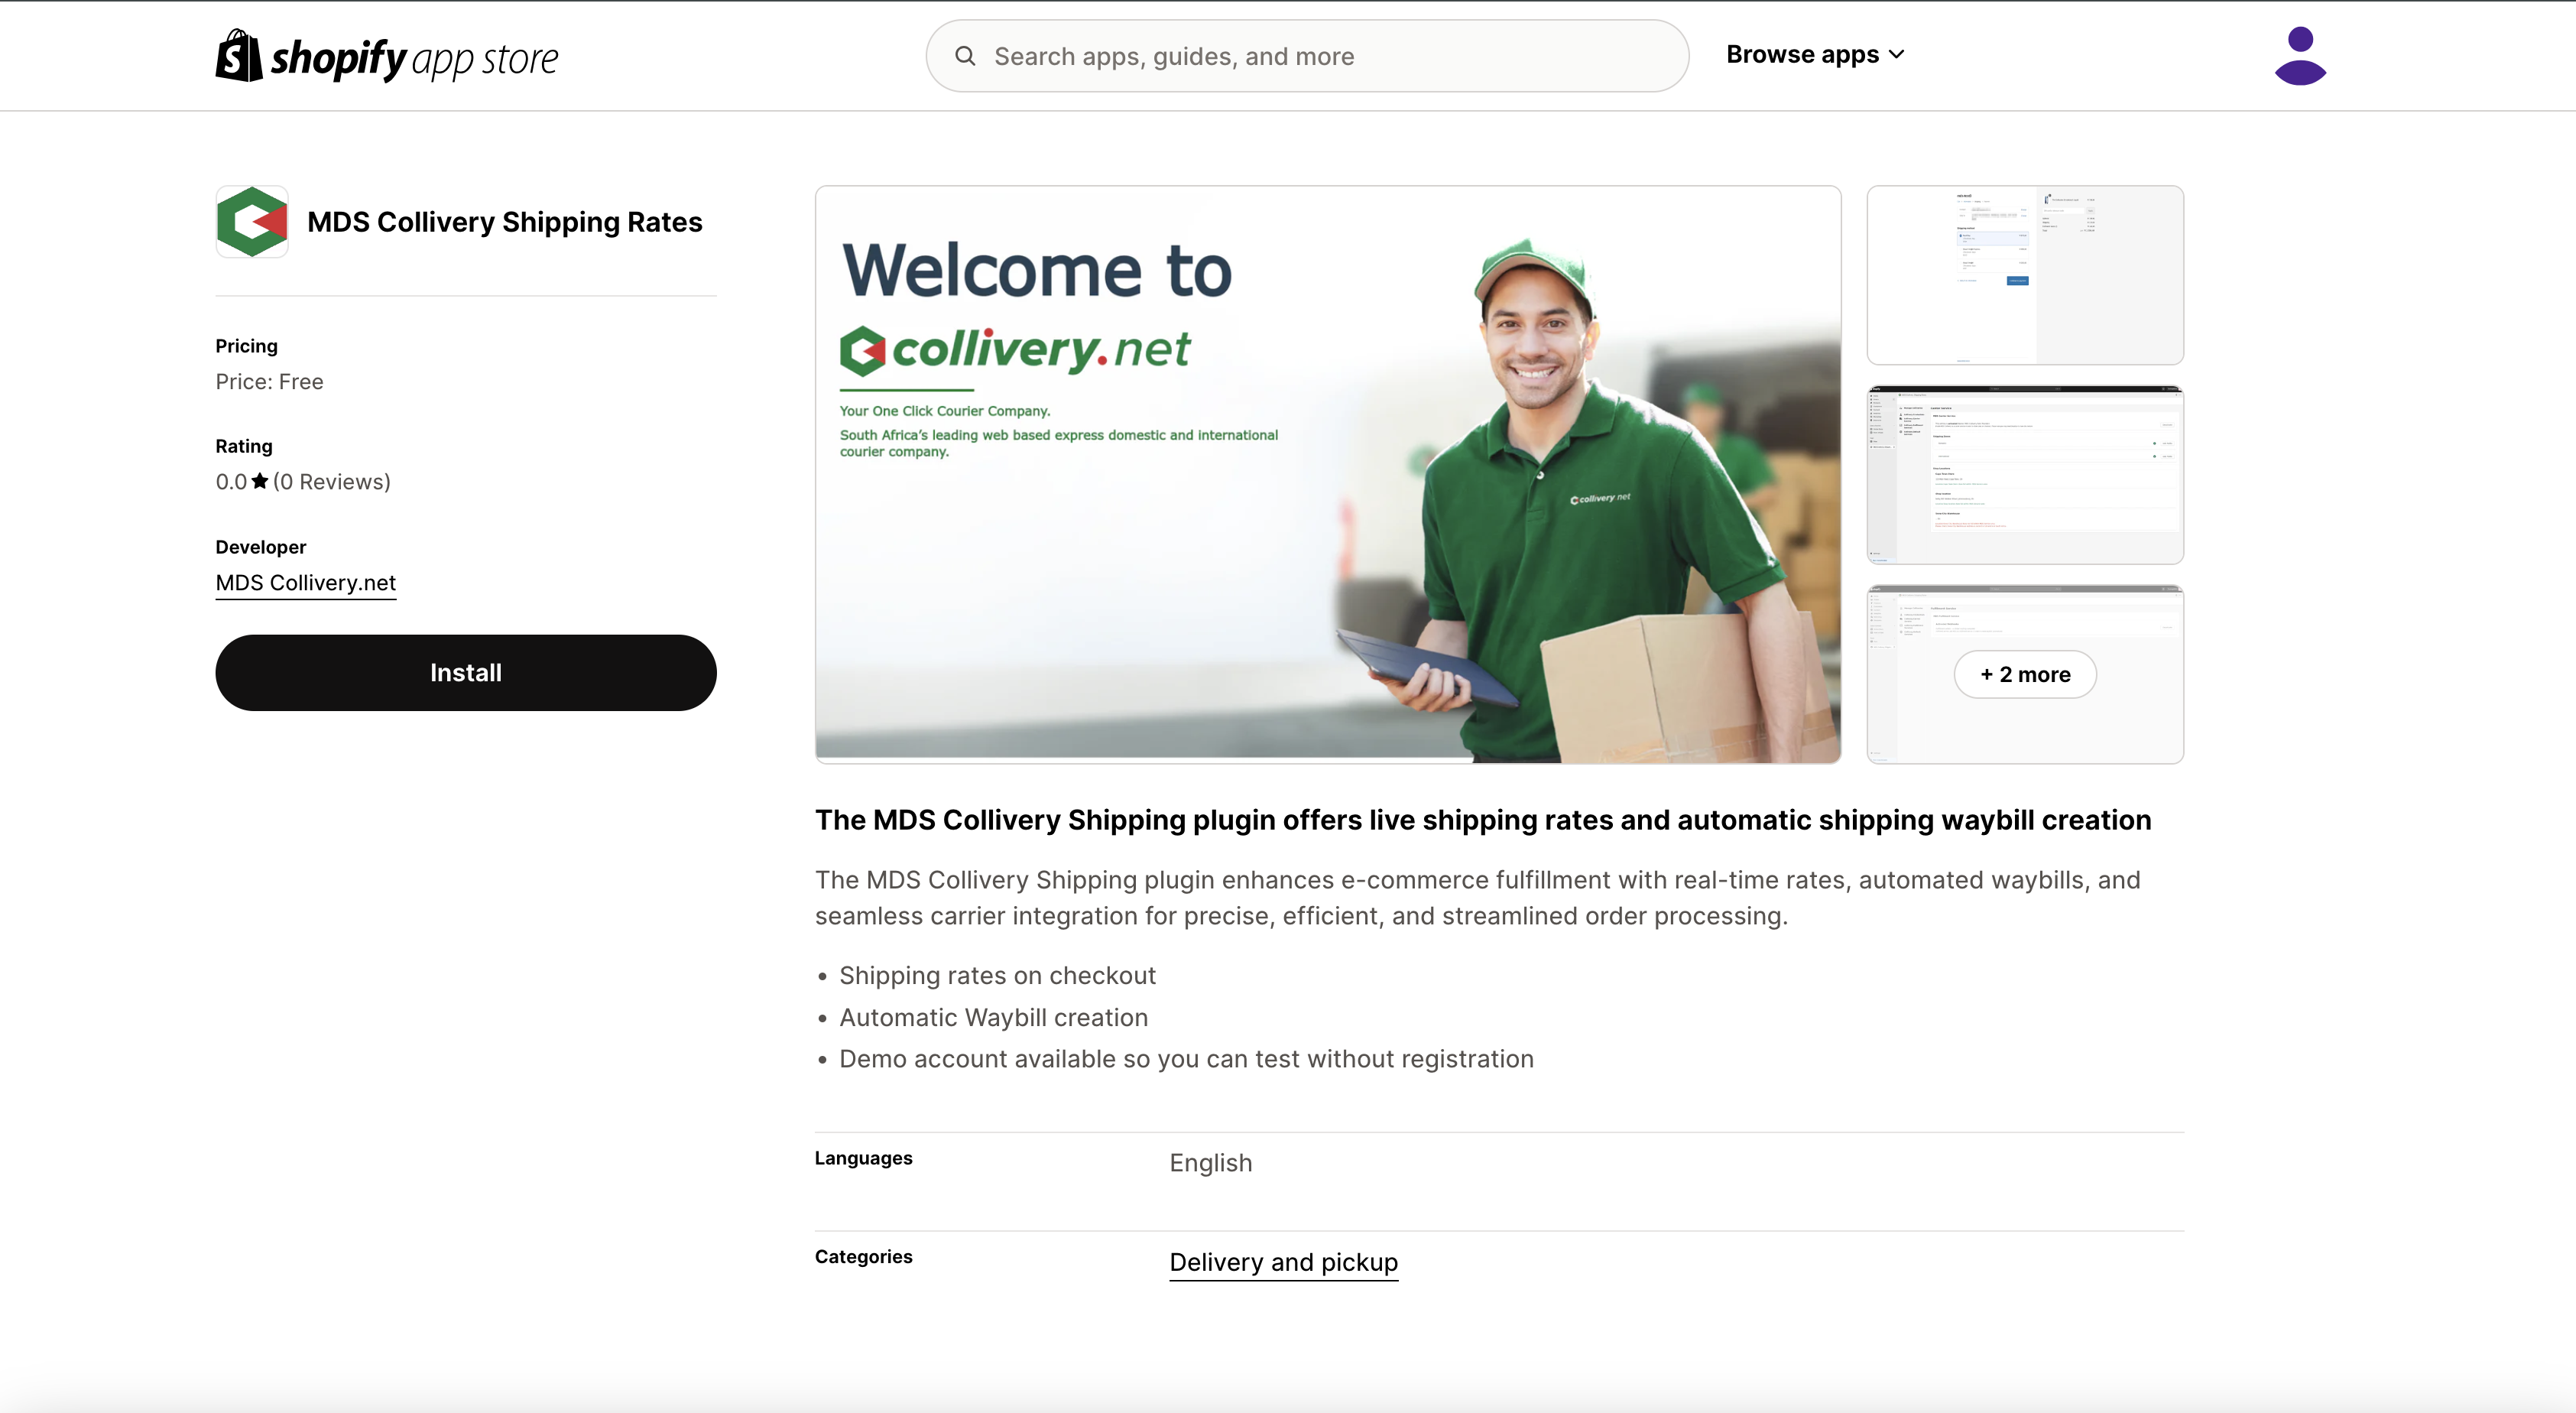
Step 1
Click on this link to navigate to the unlisted plug-in installation page.
Step 3
Review the app access requirements and click the install button.
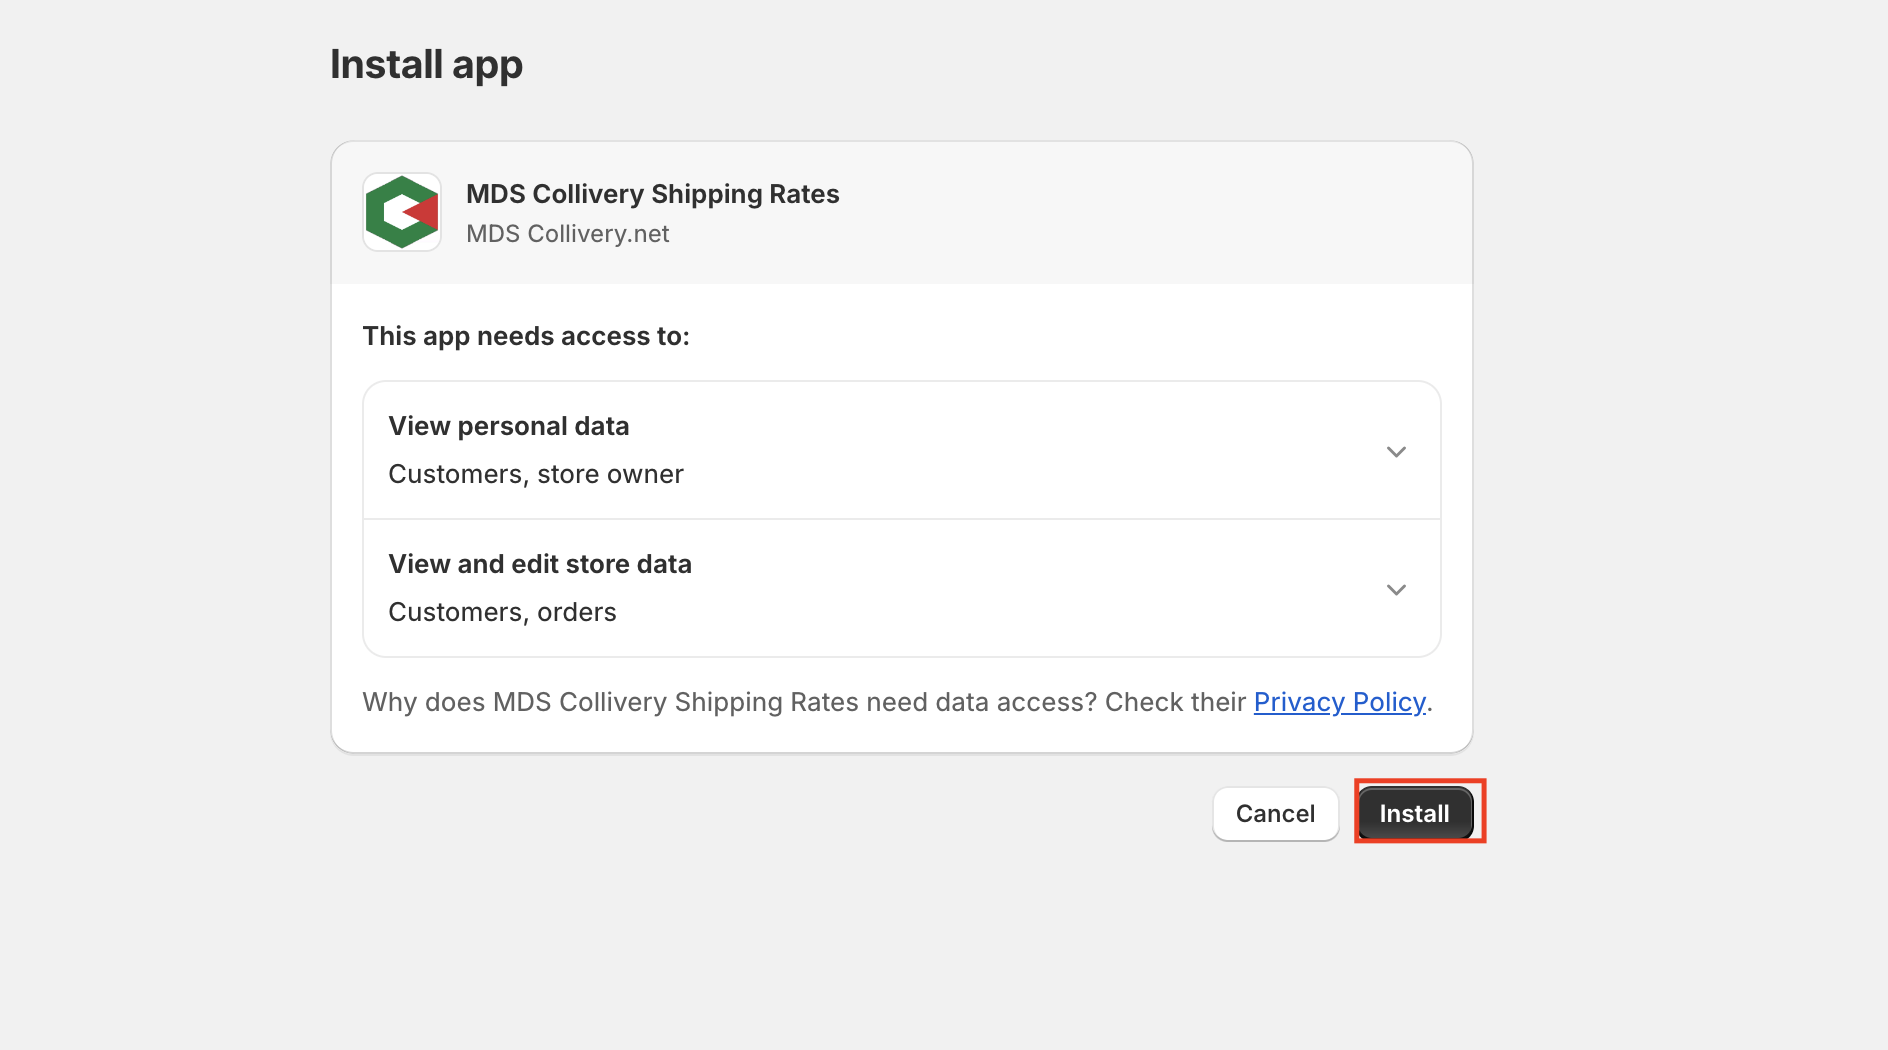
Step 2
Click on the install button
Step 3
Review the app access requirements and click the install button.
Congratulations the plugin is now installed!!
Configuration
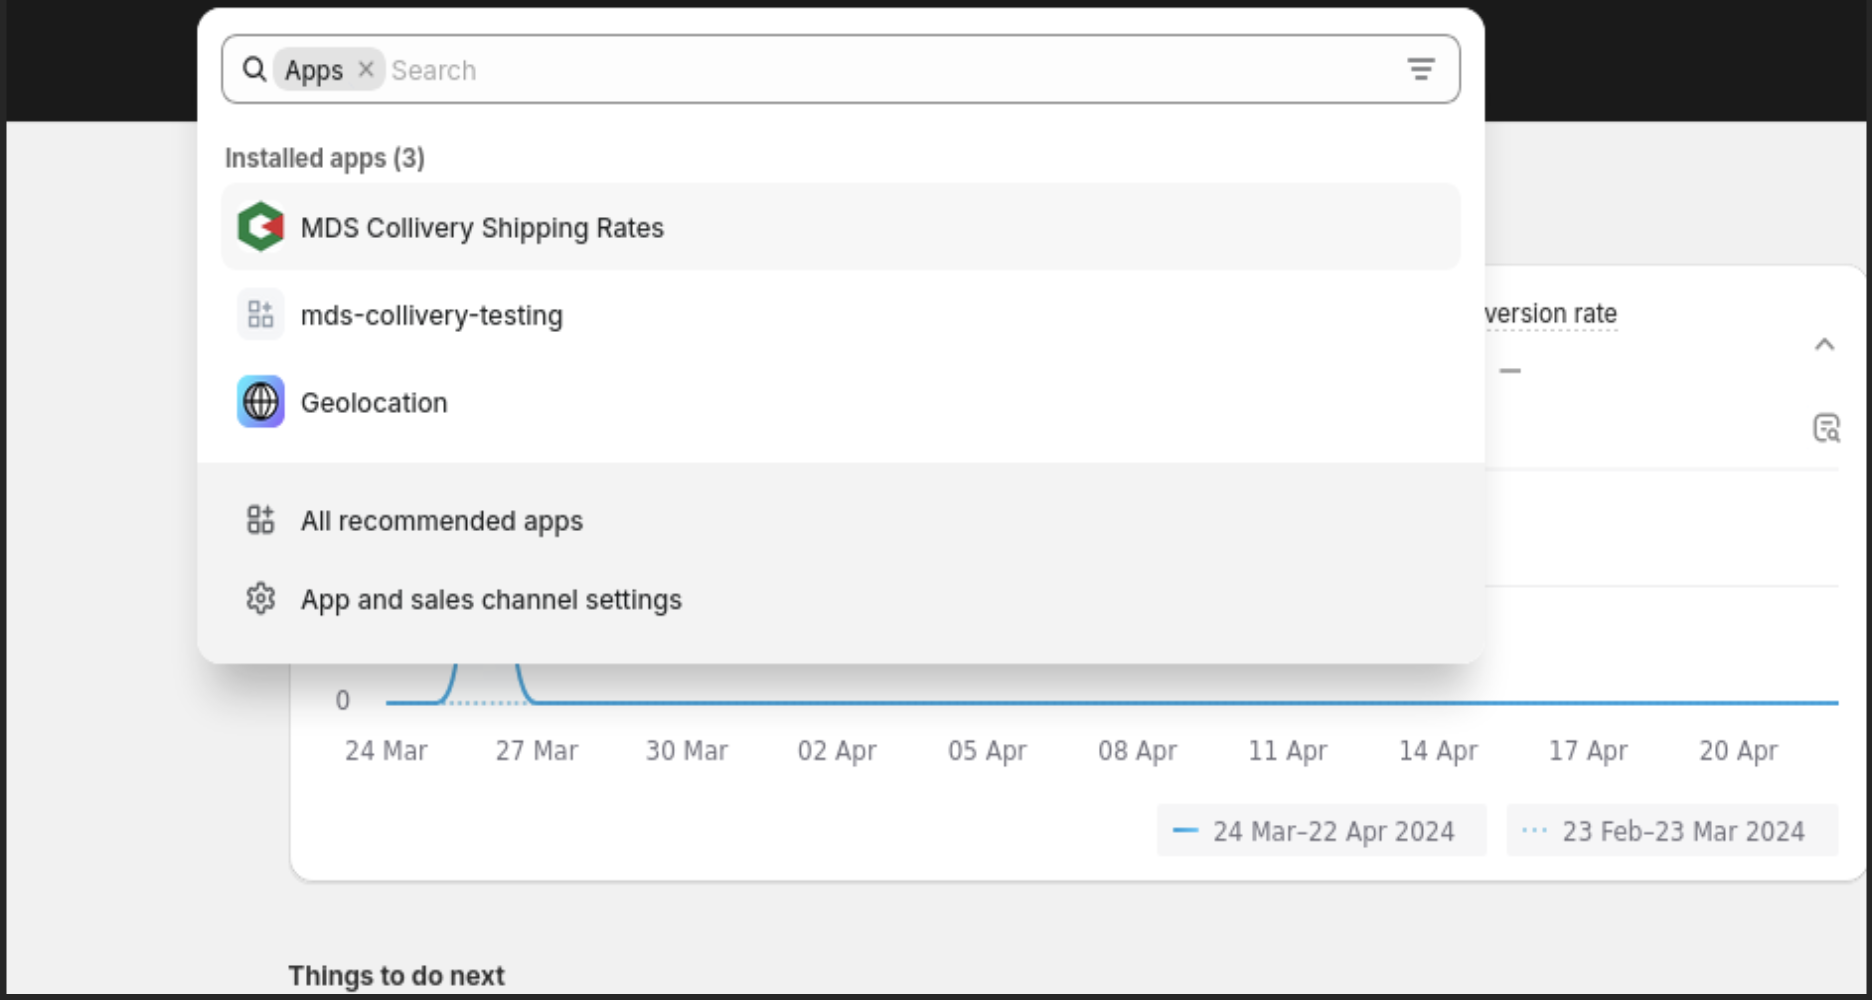
Step 1
Navigate to the MDS Collivery Shipping Rates plug-in by clicking on the left menu “Apps” link and selecting the plug-in.
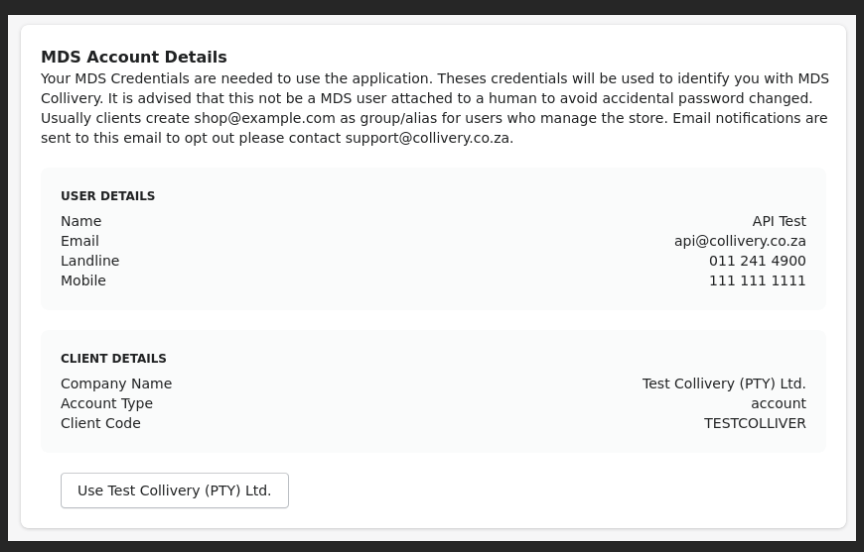
Step 3
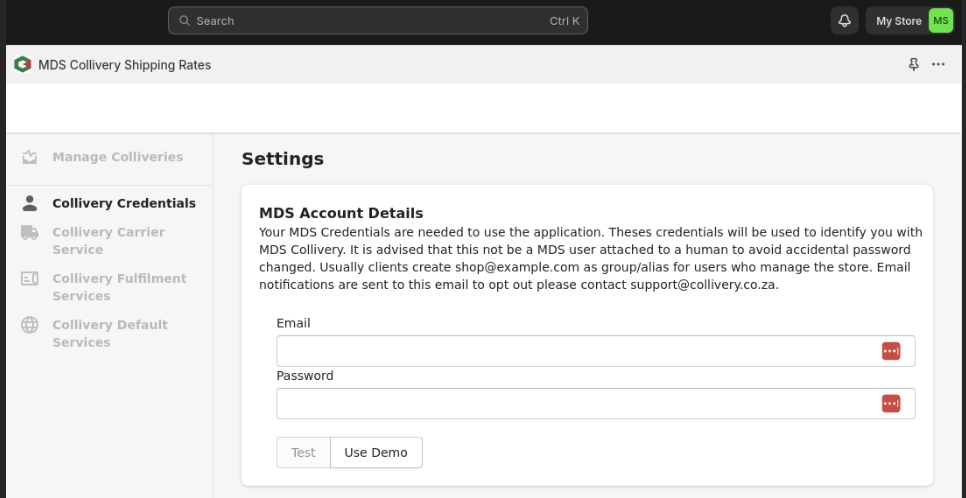
Once details have been entered, the Test button will be active. Click the Test button to check the details entered are able to authenticate with the Collivery API. If you agree with the details shown, then click the “Use **Company Name**” button.
Step 5
The Carrier service menu item allows you to active and de-activate live shipping rates on checkout. PLEASE NOTE this feature is only available on Shopify Advanced and Plus packages as stipulated by Shopify restrictions.
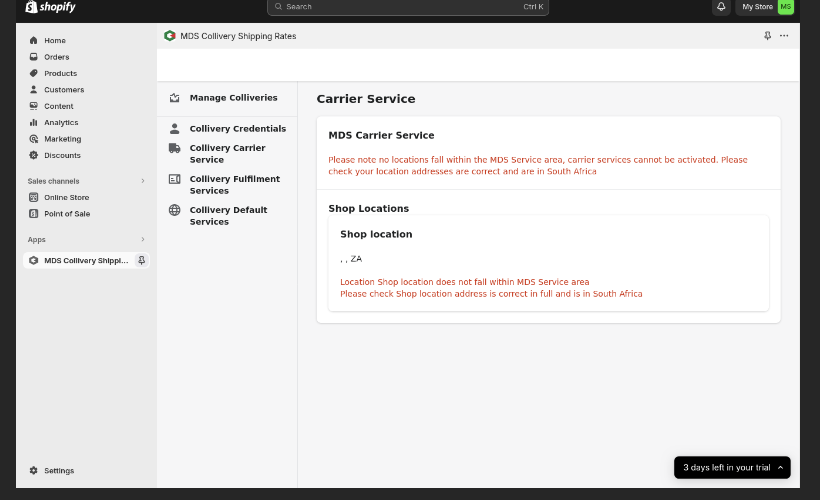
If you see a notice regarding locations not falling into the MDS Service area, please check your configured fulfilment locations in your Shopify store settings. The API requires a valid Town and Suburb name in order to calculate shipping rate. This location will be used as the default collection address when creating waybills as well as obtaining shipping rates.
Step 2
The authentication screen require your login details used to authenticate to https://collivery.net
Step 3
Once details have been entered, the Test button will be active. Click the Test button to check the details entered are able to authenticate with the Collivery API. If you agree with the details shown, then click the “Use **Company Name**” button.
Step 4
To change the authentication user, click on the “Collivery Credentials” menu item.

Step 5
The Carrier service menu item allows you to active and de-activate live shipping rates on checkout. PLEASE NOTE this feature is only available on Shopify Advanced and Plus packages as stipulated by Shopify restrictions.
If you see a notice regarding locations not falling into the MDS Service area, please check your configured fulfilment locations in your Shopify store settings. The API requires a valid Town and Suburb name in order to calculate shipping rate. This location will be used as the default collection address when creating waybills as well as obtaining shipping rates.
Step 6
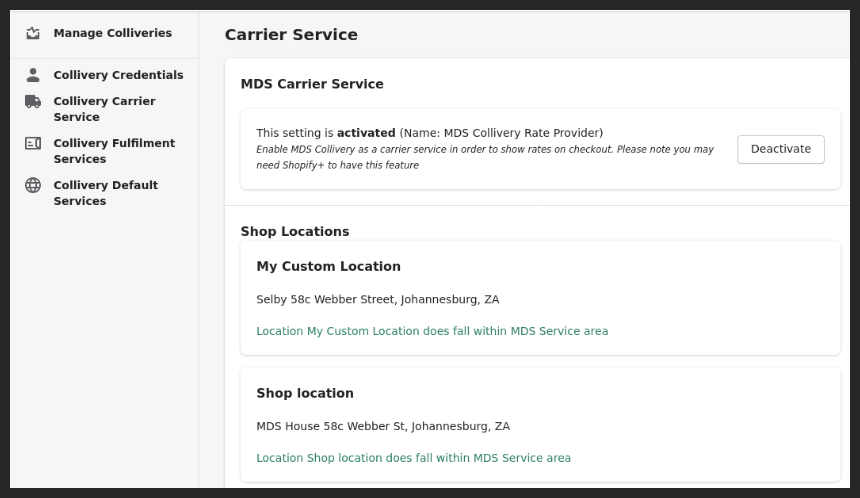
Once you have a valid address, your Carrier Service will display the Activate / Deactivate button and the list of fulfilment locations. Collivery Fulfilment Service automatically creates waybills upon successful checkout. Please ensure this feature is deactivate if not required.
Fulfilment
Step 1
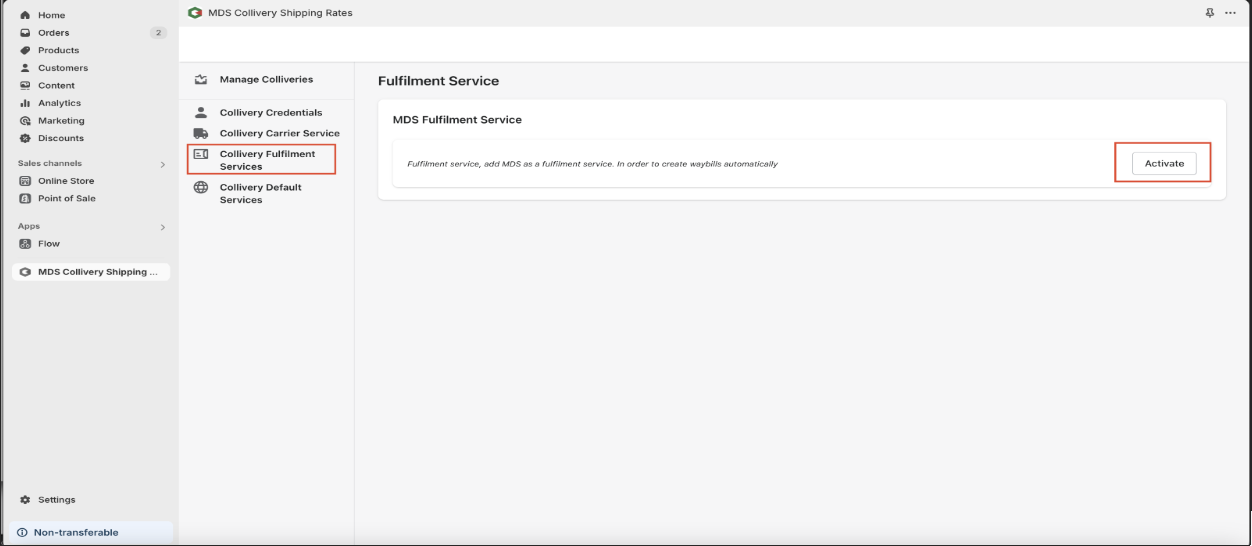
To enable automatic waybill creation upon checkout, navigate to the Collivery Fulfilment Services page and click "Activate." Once the fulfilment service is activated, waybills will be automatically generated when a customer completes the checkout process and provides their email address.
Step 2
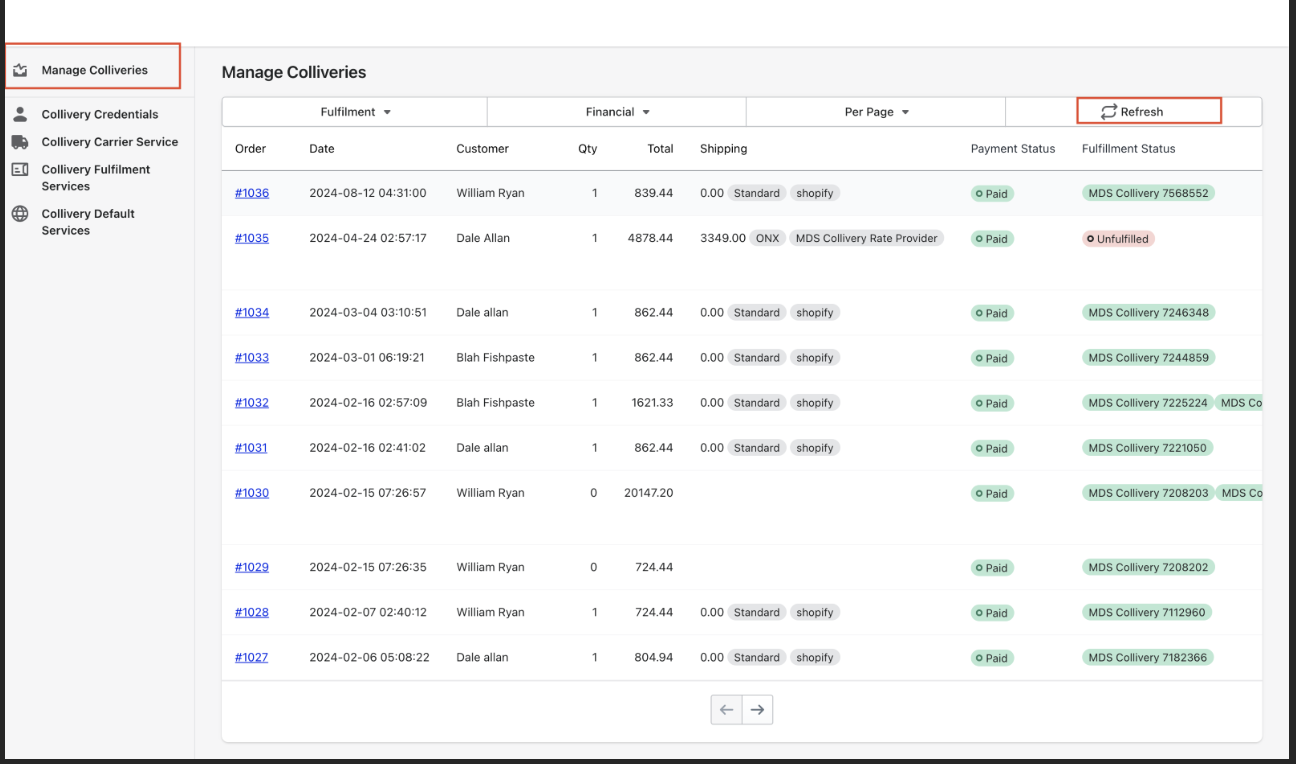
You can then view and manage the newly created waybill immediately in the manage collivery page. The new order will initially appear as "Unfulfilled." To complete the fulfilment, simply click the "Refresh" button to update the order status.
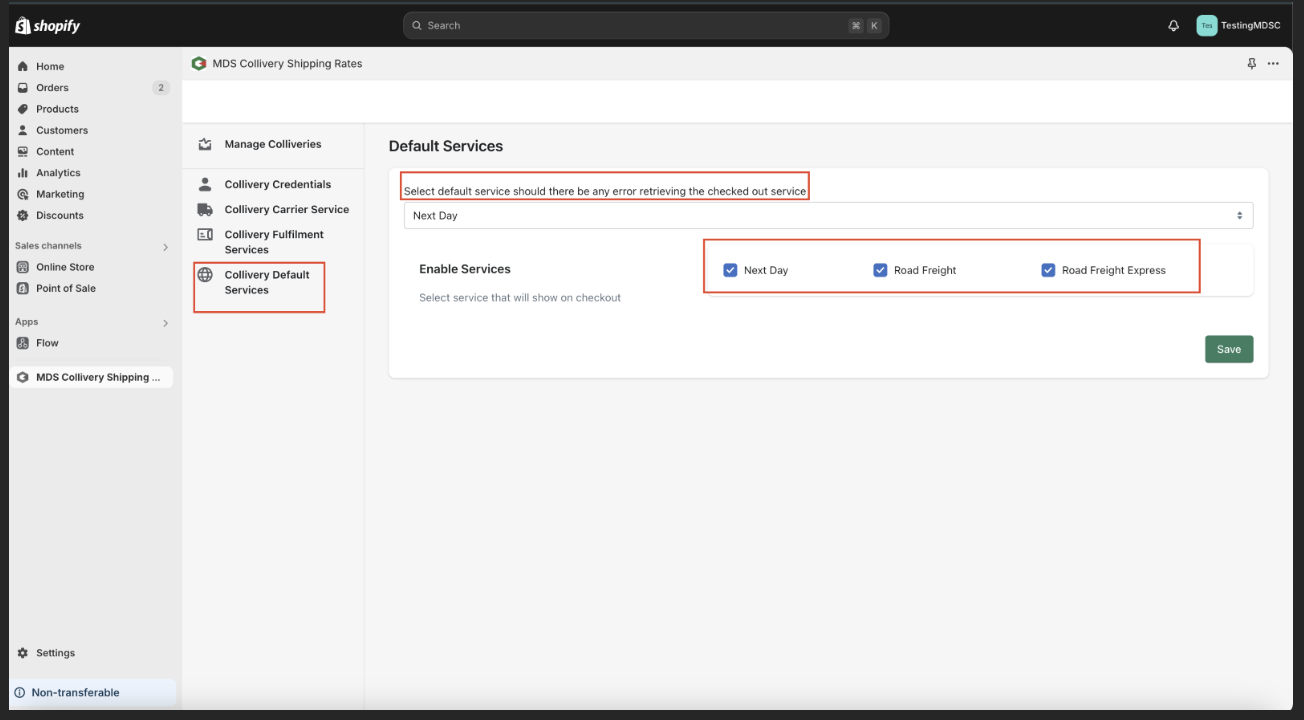
Collivery default services
To configure which services are displayed at checkout, navigate to the Collivery Default Services page. Here, you can select or deselect the services you want to show to customers during checkout. If you encounter any issues or wish to change the default service, you can easily select a different option from the dropdown list.
Order fulfilment through the Collivery.net
NB: Before proceeding, ensure that the plugin is installed on your Shopify store. When the plugin is installed and you have added your account details, your shop will be linked and displayed on Collivery.net.
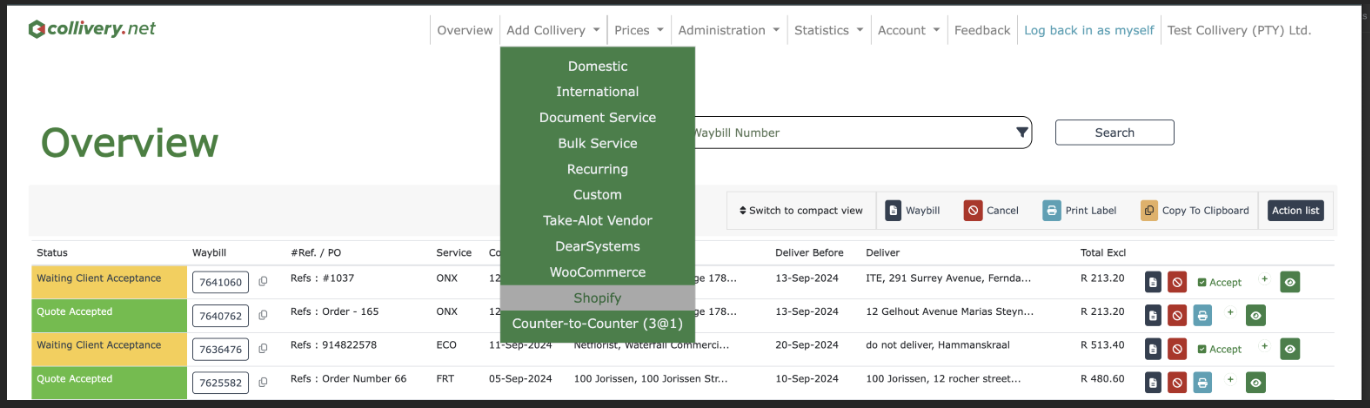
Step 1
Once logged in to Collivery.net, go to 'Add Collivery' and choose 'Shopify'.
Step 3
After selecting your shop, all your orders will be displayed below. You can then navigate to the order you want to fulfil and click the 'Fulfil Order button.
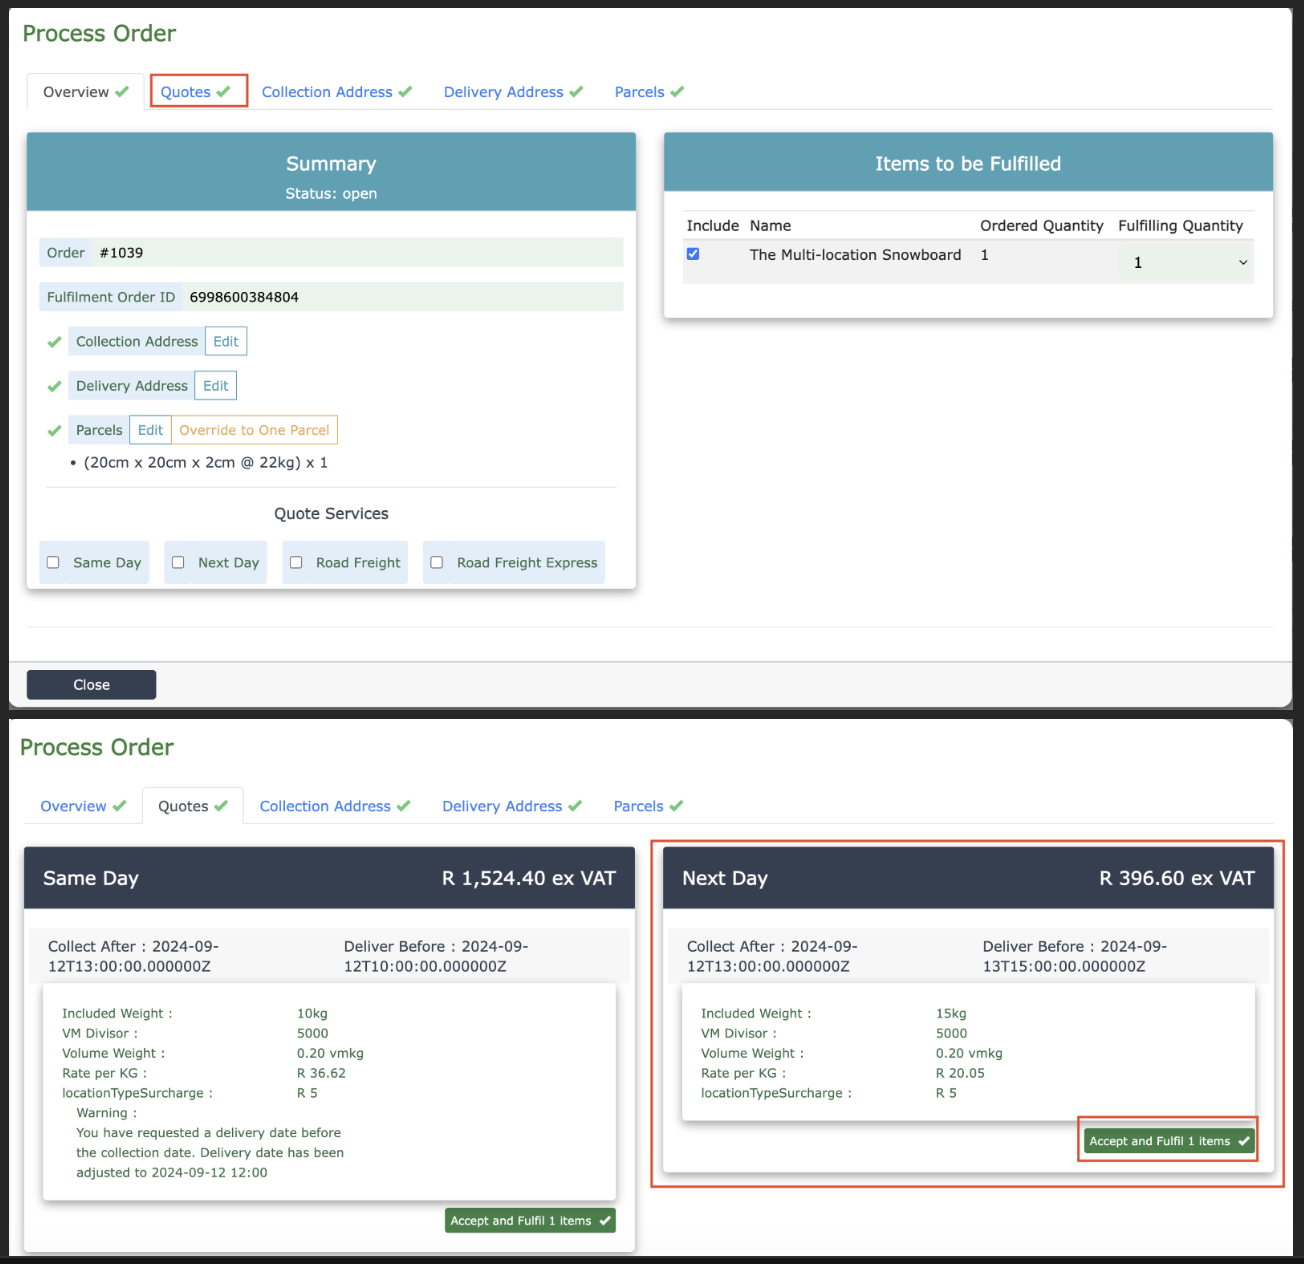
Step 5
If there are no fields that need fixing, or once all necessary corrections have been made, you can click on the 'Quote' tab, choose your desired shipping method, and then click the 'Accept and Fulfil Items ' button.
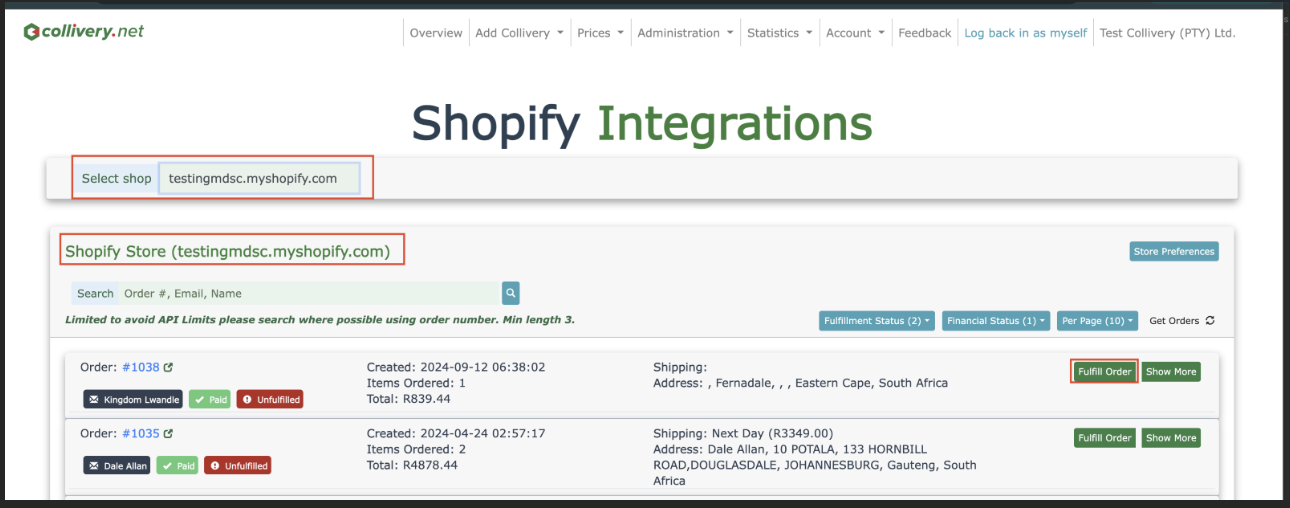
Step 2
You will be directed to the Shopify integrations page, where you need to select the shop you have added.
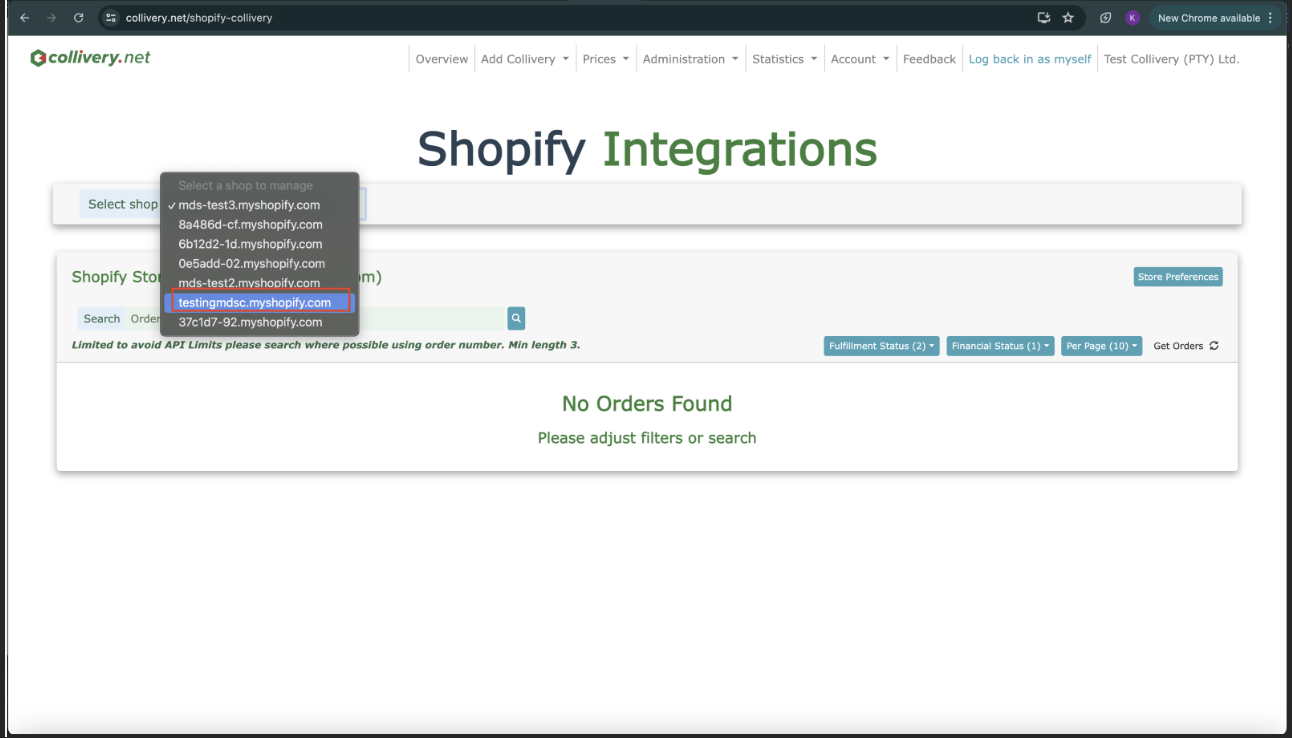
Step 3
After selecting your shop, all your orders will be displayed below. You can then navigate to the order you want to fulfil and click the 'Fulfil Order button.
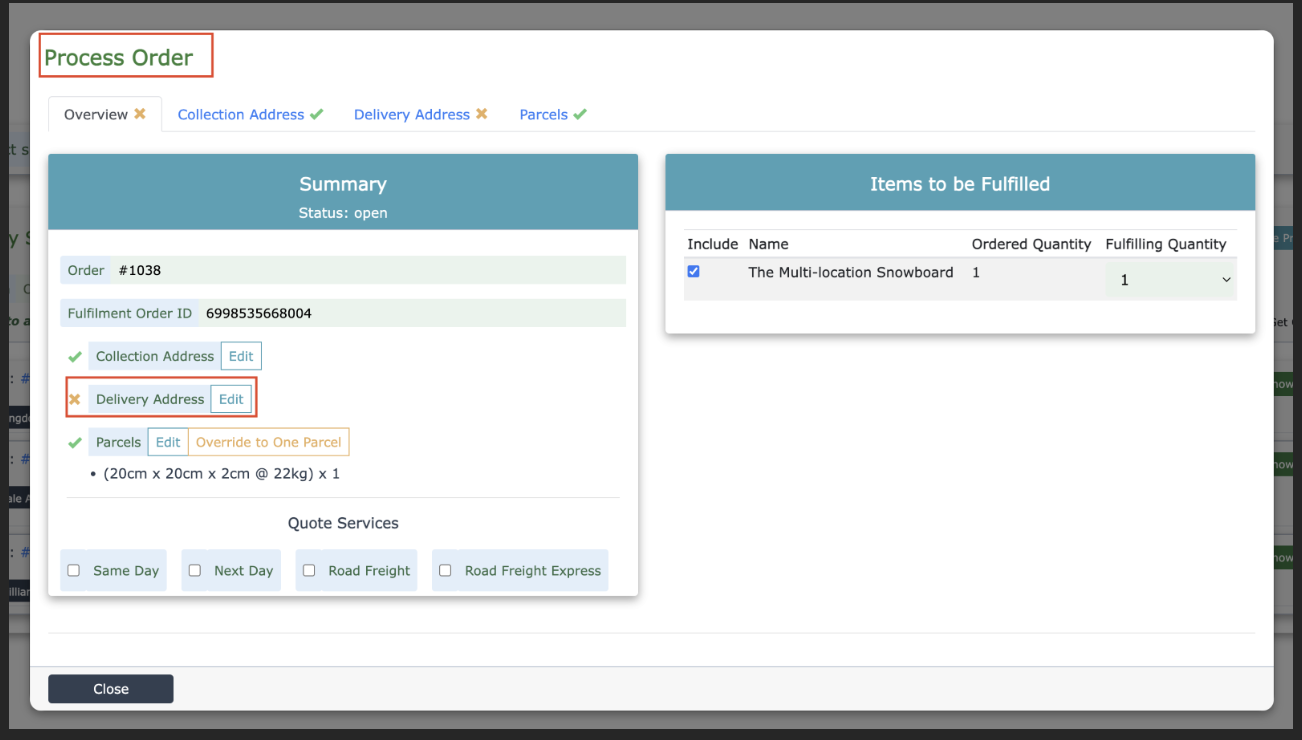
Step 4
On the process order page, you may be prompted to correct certain fields on the forms, such as parcel details or address information. Ensure that all required fields are properly filled out and corrected before proceeding.
Step 5
If there are no fields that need fixing, or once all necessary corrections have been made, you can click on the 'Quote' tab, choose your desired shipping method, and then click the 'Accept and Fulfil Items ' button.
Step 6
You will then see the fulfillment details ID at the bottom of the page, and the status of your unfulfilled order will change to 'Fulfilled.'

If you encounter any issue please do not hesitate to email us integration@collivery.co.za.